Opening Balance entries for the Other Charges - Liability can be entered at any time after your Go Live date.
![]() It would be in your best interest to complete these entries within the first month after your Go Live Date.
It would be in your best interest to complete these entries within the first month after your Go Live Date.
These entries will include, but are not limited to any Taxes or Fees collected from sales or Reclaimable Taxes paid from a purchase. Additionally, the Other Charge - Liability Opening Balances will include All Other Charges identified as “Liability” in the Other Charges setup (i.e. Tire Tax, Battery Tax, Stewardship Fees) that will be charged during a sale or purchase and be included in a Tax Remittance.
These entries will be required to process the Liability Remittance Checks through your new software system.
The sales information on the Tax Remittance screen is for generated sales through the new software system only. Therefore the sales information on the remittance screen will be $0.00 for your first Tax Remittance. Any sales values for this Tax Remittance will need to come from your old software system or records.
![]() Businesses in the United States, as a general rule, do not have reclaimable taxes, (taxes paid during a purchase). If you do not have entries for Reclaimable Taxes Paid Out, skip steps 9, 10, 11 and 12.
Businesses in the United States, as a general rule, do not have reclaimable taxes, (taxes paid during a purchase). If you do not have entries for Reclaimable Taxes Paid Out, skip steps 9, 10, 11 and 12.
Tire Levy Charge = $250.00
Canadian Harmonized Sales Tax = $2,000.00
Canadian Harmonized Sales Tax Paid Out (Reclaimable) = $500.00
From the General Ledger Manager, select “GL Adjustments” at Top Left.
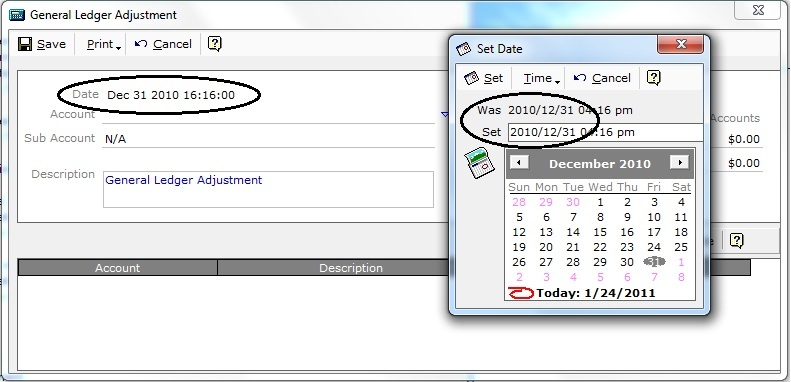
Figure 1
In this example the Go Live Date is Jan 1, 2011. We will use Dec. 31, 2010 as the date for the Opening Balance entries.
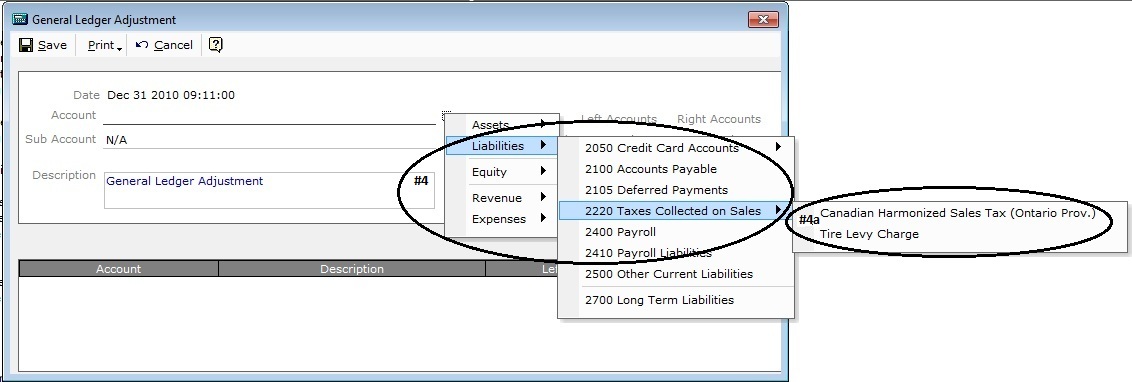
Figure 2
On the Account line, select Liabilities | 2220 Taxes Collected On Sales
Select the account from the list.
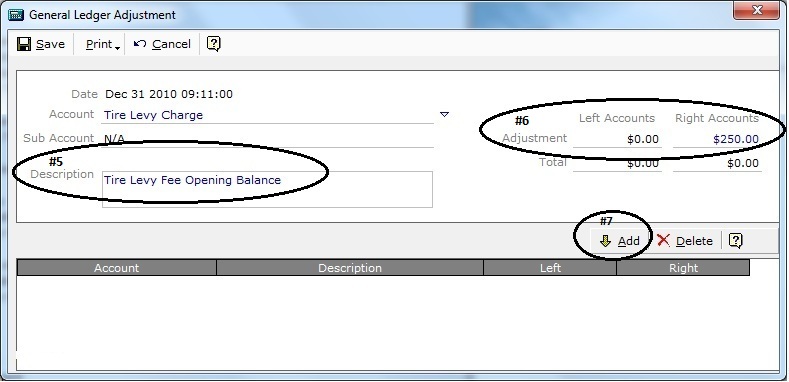
In the Description Box, enter a description for this GL Adjustment entry. The description is what will be referenced in the accounting reports (i.e. Audit Trail and Account Journals).
On the Adjustment – Right Accounts line enter the Opening Balance value for this account.
Click the Add button.
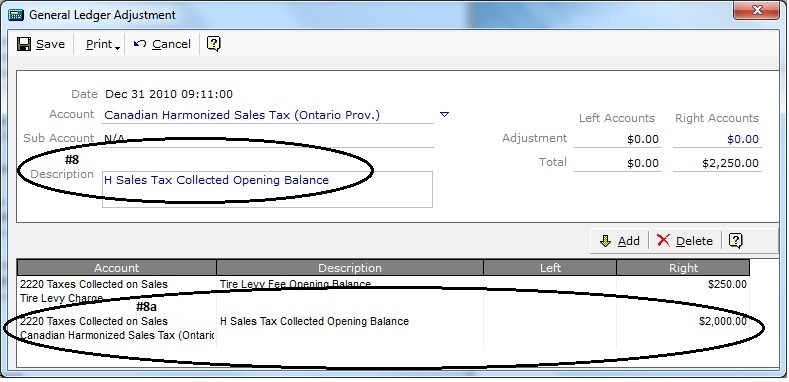
Figure 4
Continue to select and add Opening Balances for all Other Charge – Liabilities.
In the Description Box, edit the description as needed for additional Other Charge – Liability Opening Balances.
WHERE THERE ARE RECLAIMABLE TAXES PAID OUT (I.E. GST OR HST) ENTER THE OPENING BALANCES.

Figure 5
On the Account line, select Assets | 1300 Reclaimable Taxes Paid Out.
Select the account from the list.
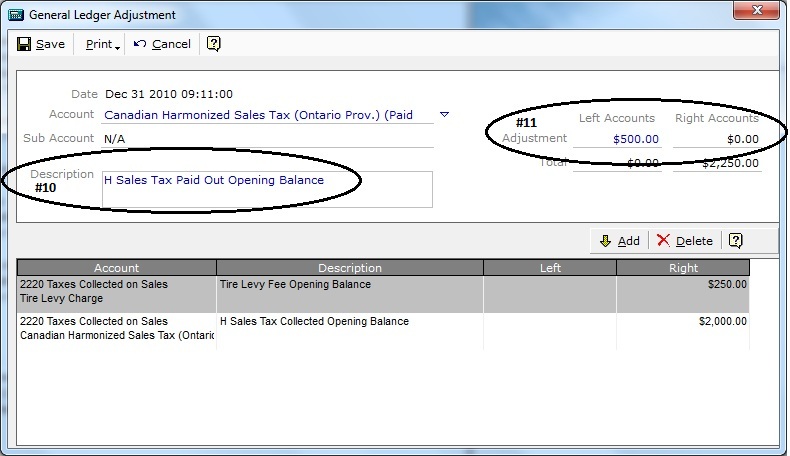
Figure 6
In the Description Box, enter a description for this GL Adjustment entry. The description is what will be referenced in the accounting reports (i.e. Audit Trail and Account Journals).
On the Adjustment line – Left Accounts line enter the Opening Balance for this account.
Click on the Add button.
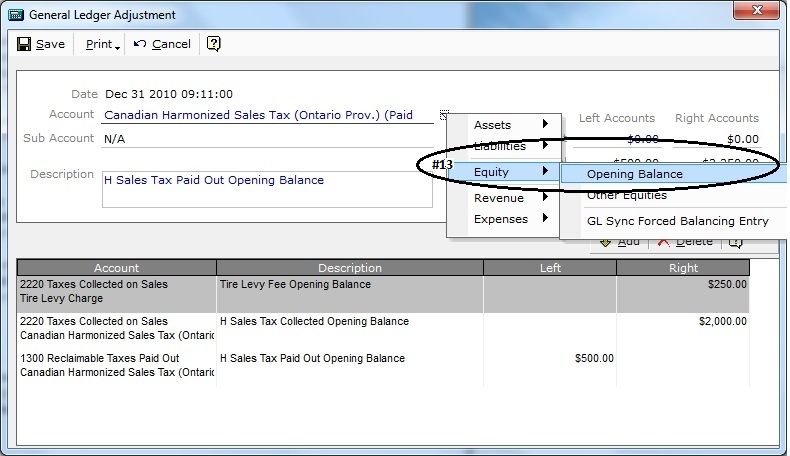
Figure 7
ALL OPENING BALANCE ENTRIES WILL REQUIRE AN OFFSETTING BALANCED ENTRY.
On the Account line, select Equity | Opening Balance
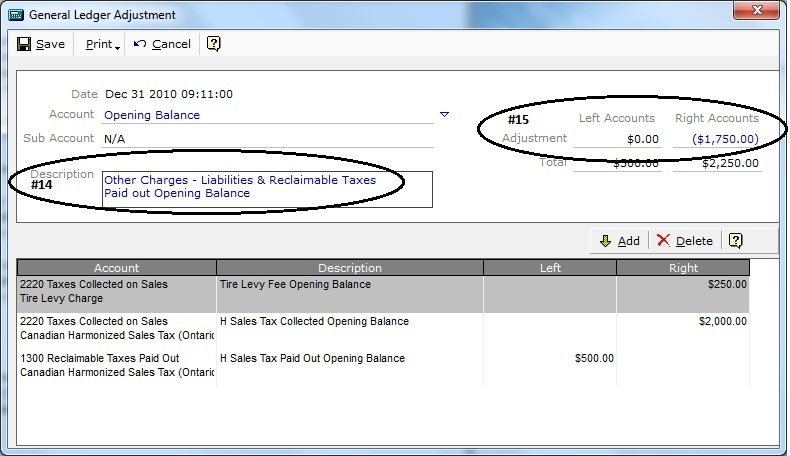
Figure 8
In the Description Box, enter a description for this GL Adjustment entry. The description is what will be referenced in the accounting reports (i.e. Audit Trail and Account Journals).
On the Adjustment – Right Accounts line, enter the value to Balance the Total line for the Left and Right Account lines.
Values can be positive or negative. For negative values enter a (-) either in front or behind the value.
Click on the Add button.
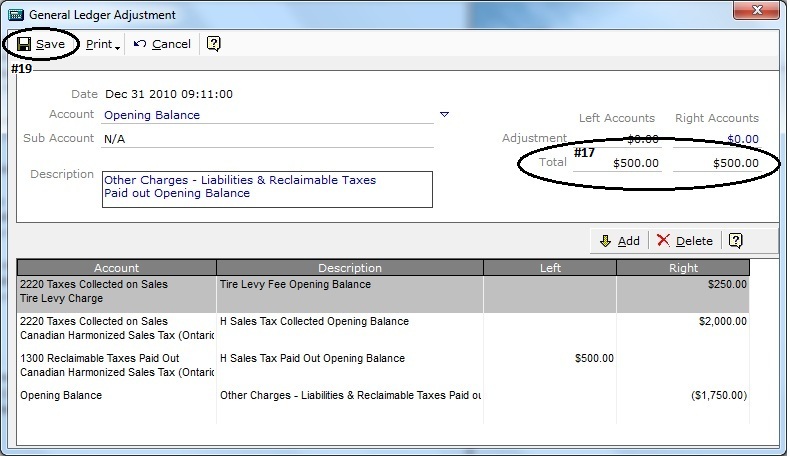
Figure 9
The Final Entry for the Opening Balances must ensure that the Total for the Left and Right Accounts lines balance.
Verify all entries.
Click the Save button at the Top Left.