Discussion
Entries for Account Receivable Opening Balances can be entered at any time after your Go Live date.
![]() It would be in your best interest to complete these entries within the first month after your Go Live Date.
It would be in your best interest to complete these entries within the first month after your Go Live Date.
For best results, prepare a list of current account receivable balances using the date prior to your Go Live Date. This list will need to include Receivable Account Name and Balance as of the date prior to your Go Live Date.
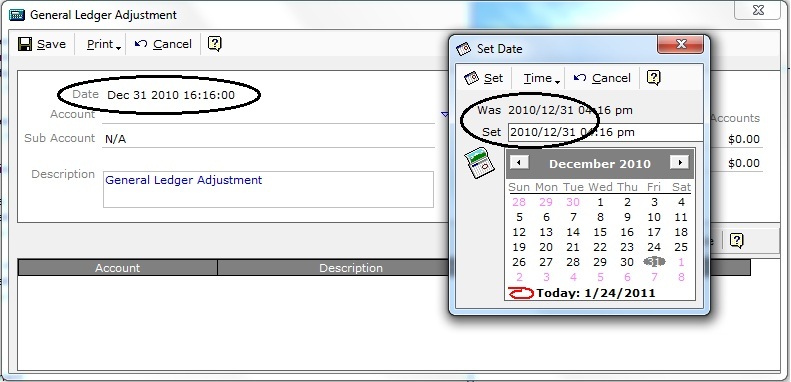
Figure 1
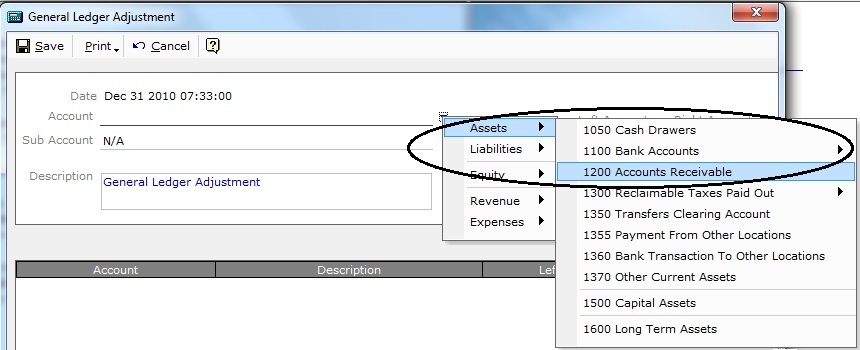
Figure 2
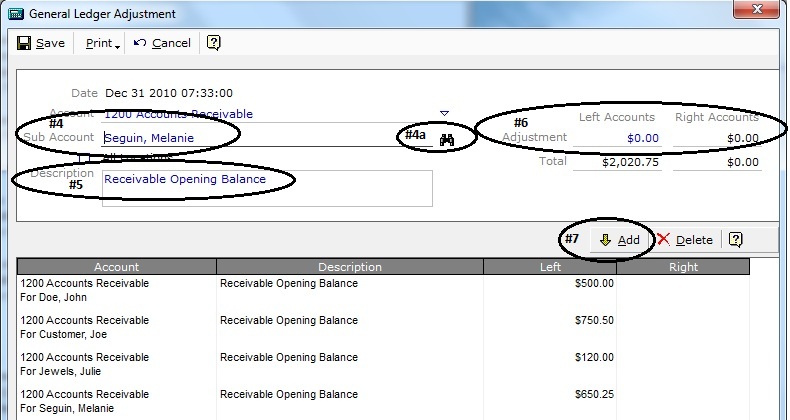
Figure 3
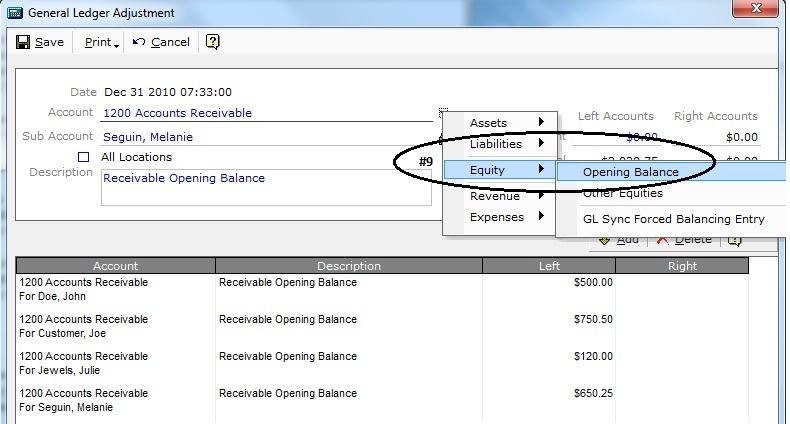
Figure 4
ALL OPENING BALANCE ENTRIES WILL REQUIRE AN OFFSETTING BALANCED ENTRY
Set the Account line to Equity | Opening Balance.
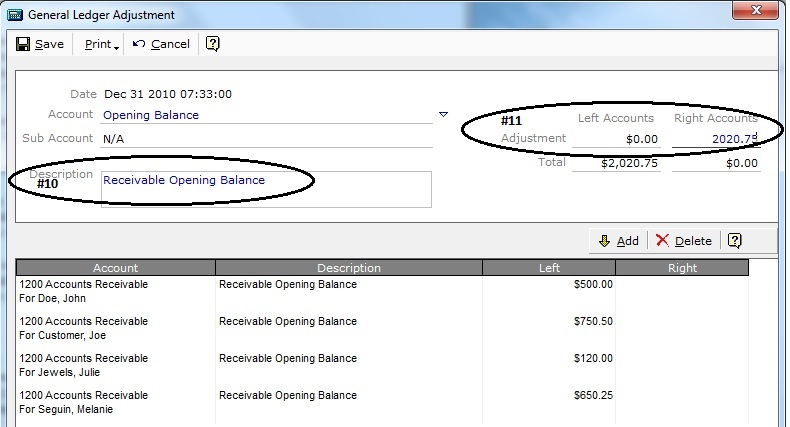
Figure 5
In the description box, enter a description for this GL Adjustment entry (i.e. Receivable Opening Balance.) The description is what will be referenced in the accounting reports (i.e. Audit Trail and Account Journals).
On the Adjustment – Right Account line, enter the value to Balance the Total line for the Left and Right Account lines.
Value can be positive or negative. For negative values enter a (-) either in front or behind the value.
Select Add.
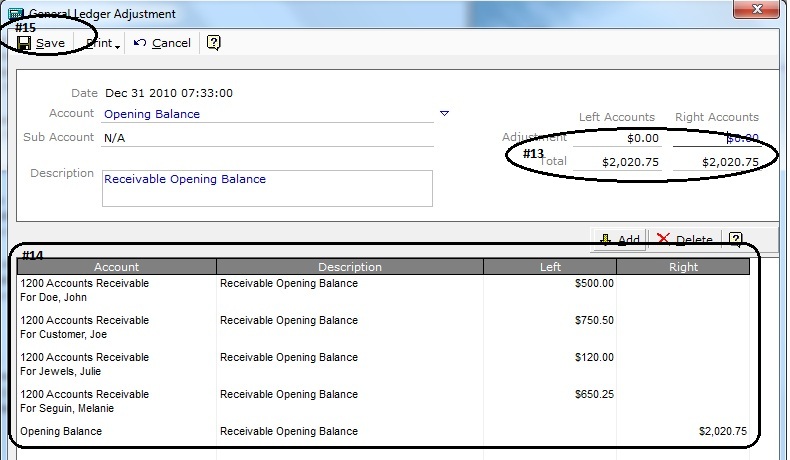
Figure 6
The Final Entry for the Opening Balance must ensure that the Total for the Left and Right Account lines Balance.
Verify all entries.
Select Save at Top Left.
These values will be entered into the 1200 Account Receivable for the Customer/Receivable Account.
All entries will be displayed in the Receivable Account from the GL Adjustment Date, Description and Value.
* Aged Monthly and/or individual invoice entries can be made but require the GL Adjustment Date to be set to the dated entry. This process can be used for each aged invoice or month total. If entering aged invoices, use the invoice # in the description field. If entering aged balance by month, use the Opening Balance & Month in the description field. Using this process will be timely and offers many opportunities for errors in entry.
Entering Account Receivable Opening Balances
Discussion
Entries for Receivable Opening Balances can be entered at any time after your Go Live date. For best results, prepare a listing of current account balances using the date prior to your Go Live date. This list will need to include Receivable Account Name and Balance. Follow these steps to enter the Receivable Opening Balances.
From the General Ledger Manager, select “GL Adjustments” @ top left.
- 1 -
On the Sub Account line, enter the Customer / Account Name.
In the description box, write “Opening Balance”.
On the Adjustment line, enter the Receivable Opening Balance
Select Add.
v Continue to enter all Receivable Balances.
When all Receivable Balances are entered, on the Account line select Equity > Opening Balance.
- 2 -
In the Description Box, write, “Opening Balance – Receivables”.
In the Right Accounts column @ top right, enter the offsetting $ value to balance the Total line.
Select Add.
balance.
Double check all entries, select Save @ top left.
These values will be entered into the 1200 Account Receivable for the Customer / Account Name.
All entries will be displayed using the GL Adjustment Date, Description and Value as entered.
v Printed copies will offer backup reference, if needed.
* Aged Monthly and/or individual invoice entries can be made but require the GL Adjustment Date to be set to the dated entry. This process can be used for each aged invoice or month. If entering aged invoices, use the invoice # in the description field. If entering aged balance by month, use the Opening Balance & Month in the description field. Using this process will be timely and offers many opportunities for errors in entry.
- 3 -