Inspections (8:15)
A vehicle inspection is a significant opportunity for more revenue. Inspections are essential to good customer service, accuracy in diagnosis, and proper maintenance. Standard inspection forms are important in providing consistency in reporting and communicating with the service advisors.
In this article, you can learn how to:
generate inspections for the technician
access an inspection on work order
record findings on an inspection form
add services that correspond to the findings
update the status of the work order when the inspection is complete
Before reading this article, consider watching this video:
Inspections correspond to service concerns. When creating a new work order, the customer is queried about problems they are having with the vehicle or services that they require for the vehicle. Below, we see a battery inspection is one of the items shown in the additional services popup that appears during the creation of a work order.
Inspections appear as line items in the main panel of a work order. In the figure below, we see both a 30- Point Maintenance Inspection and a Battery Pinpoint Inspection on an example work order.
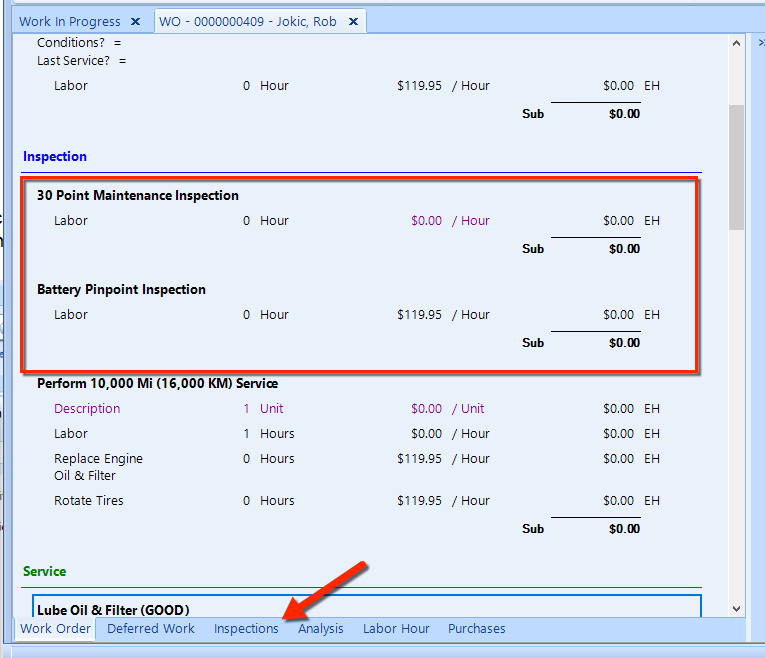
To see inspection details, click the Inspections tab at the bottom of the work order pane. Typically, a copy of the inspection is printed for the technician, but it can be reprinted at any time. As shown in the figure below, use the print buttons in the ribbon to print the inspection form.
After the technician completes the paper inspection form, the service advisor can record the results on the Inspection tab. Or, if the technician has access to Shop Manager, s/he can enter inspection results directly into this tab.
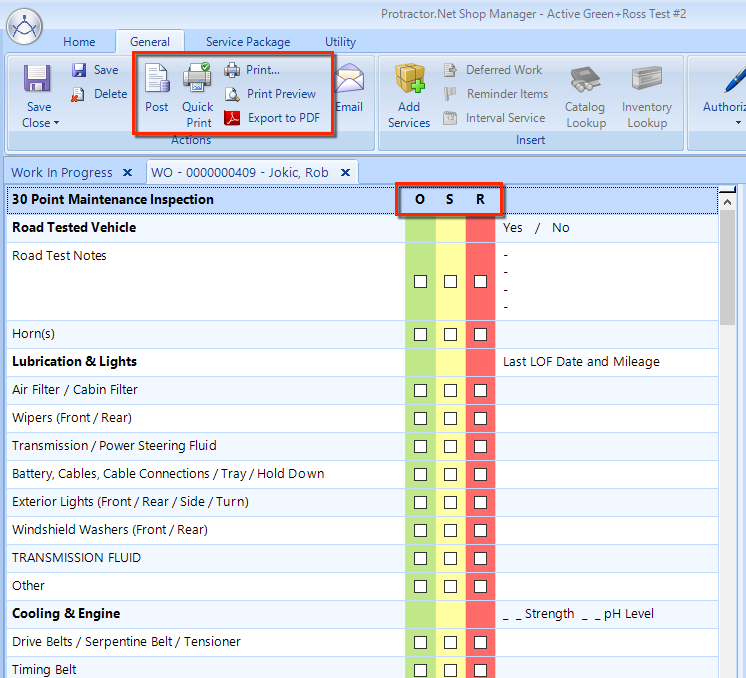
The O, S, and R headings (at the top of the inspection item listing, as shown in the figure above) are Motorist Assurance Program conventional headings to classify each inspection item:
O – OK. The inspection item has no issues on this vehicle.
S – Suggested. The technician suggests that the inspection item should get repair or service.
R – Required. The inspection item must get repair or service for the vehicle to continue safe operation.
The last column is where the advisor can add notes about inspection results. You can double-click anywhere on the row for a specific item to see a pop-up window, as shown in this figure:
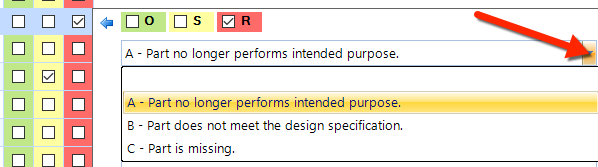
Choose one of the items from the drop-down, such as A- Part no longer performs intended purpose. Enter any inspections notes in the popup field.
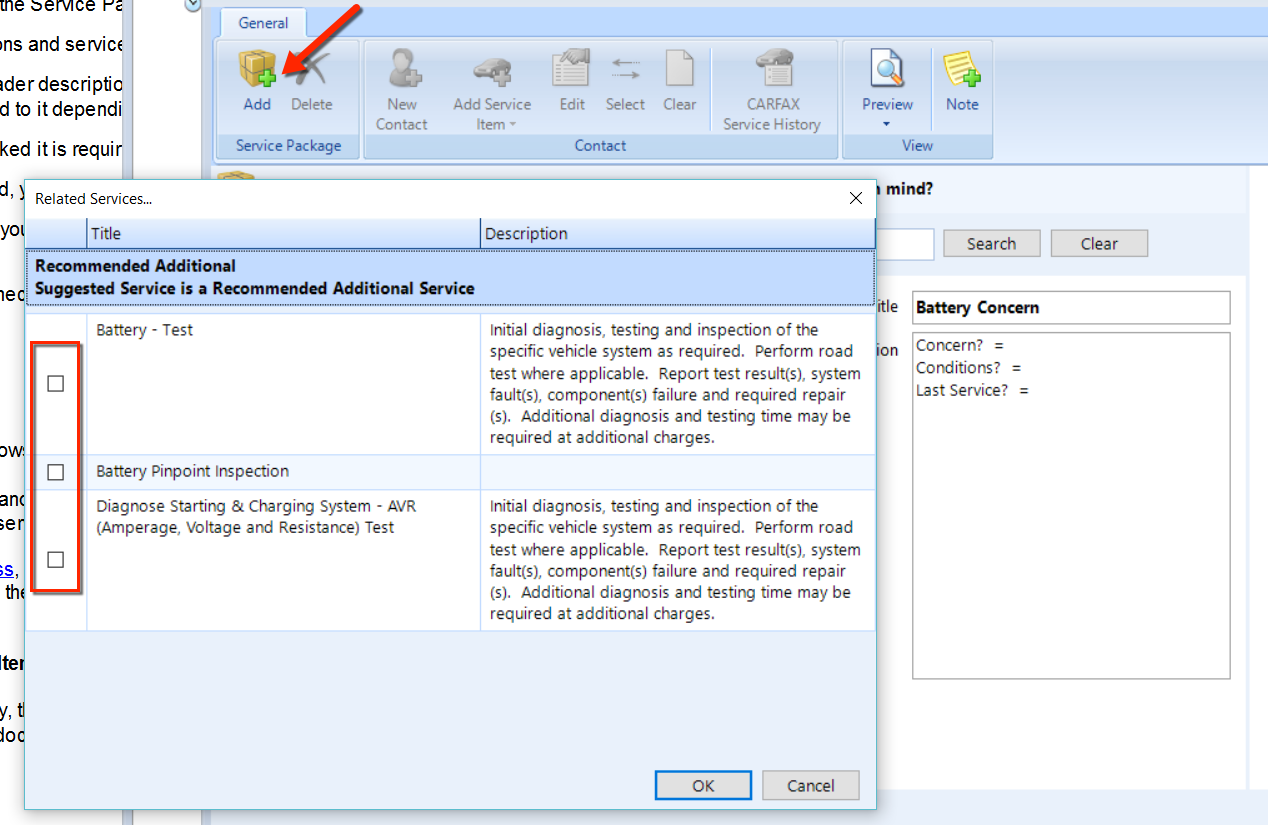
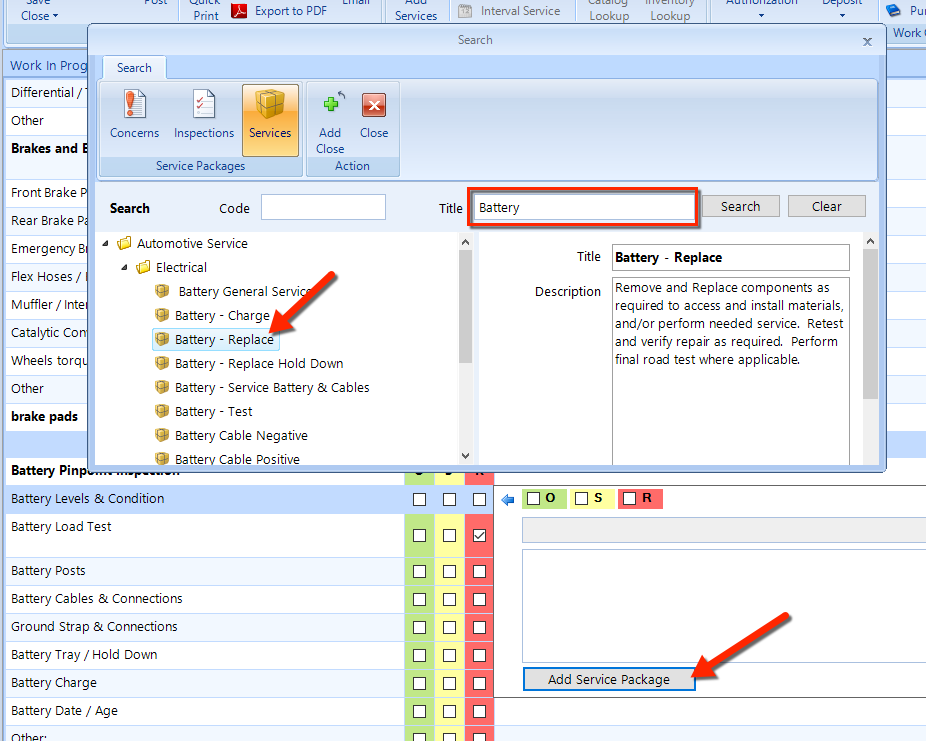
To add a service package to that corresponds to this inspection item, click the Add Service Package button. In the Service Package Search popup window, enter a Code and/or a Title and click the Search button. From the tree in the left panel, double-click on an item to choose it as the service item (as shown in the figure). Or, choose from the quick-pick list if you have set it up.
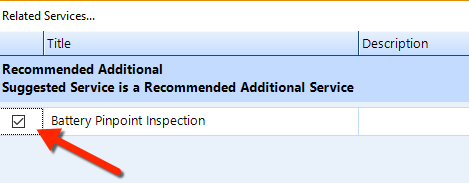
In the Related Services popup, choose the appropriate service(s) that correspond to the inspection item (as shown in the figure below). Click OK to add the service item to the work order.
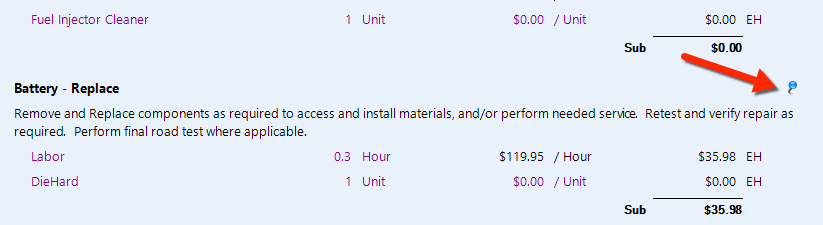
Repeat the steps above for each of the actionable items in the listing on the Inspection tab. After adding services for each of these inspection items, click back on the Work Order tab and scroll to the bottom to see the service items that you have added (much like is shown in the figure below).
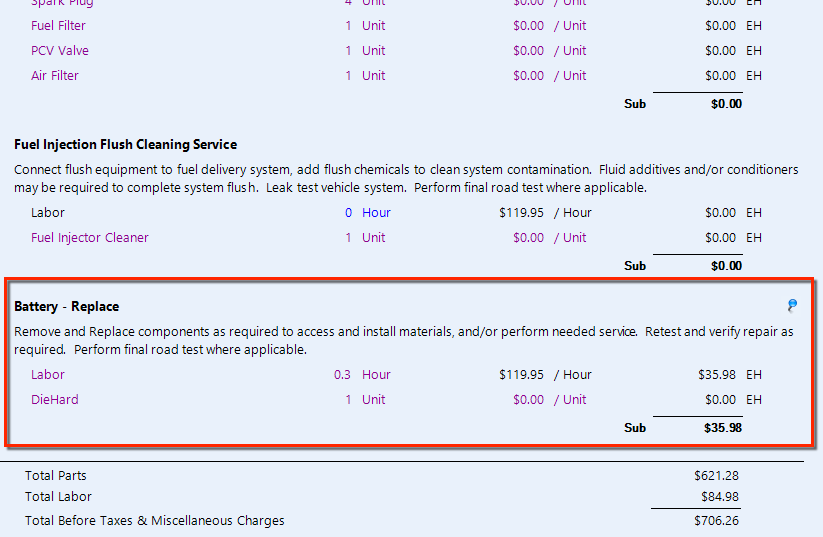
Notice the small push pin icon to the right of the service item title. Click it to return to the corresponding inspection item.
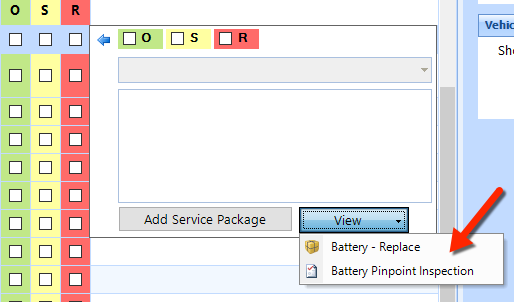
To return to the service item in the Work Order tab, double-click the inspection item, then click the View drop-down, and then choose the service item. In our example, the service item is Battery - Replace, as shown in the figure below.
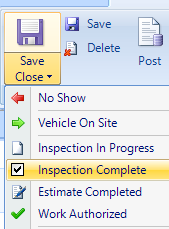
As you move through the inspections listing, click the Save button in the ribbon to commit your changes. After working through all of your inspections, click the Save & Close drop-down button in the ribbon and choose Inspection Complete to commit all changes and close the work order.