Use the Scheduler to manage appointment bookings. The calendar workspace makes it easy to see appointments at-a-glance, see open timeslots, and reschedule when necessary.
There are three views within the scheduler: Month, Week, and Day.
Click the Work Orders button on the Home ribbon, and then click the Scheduler button in the ribbon.
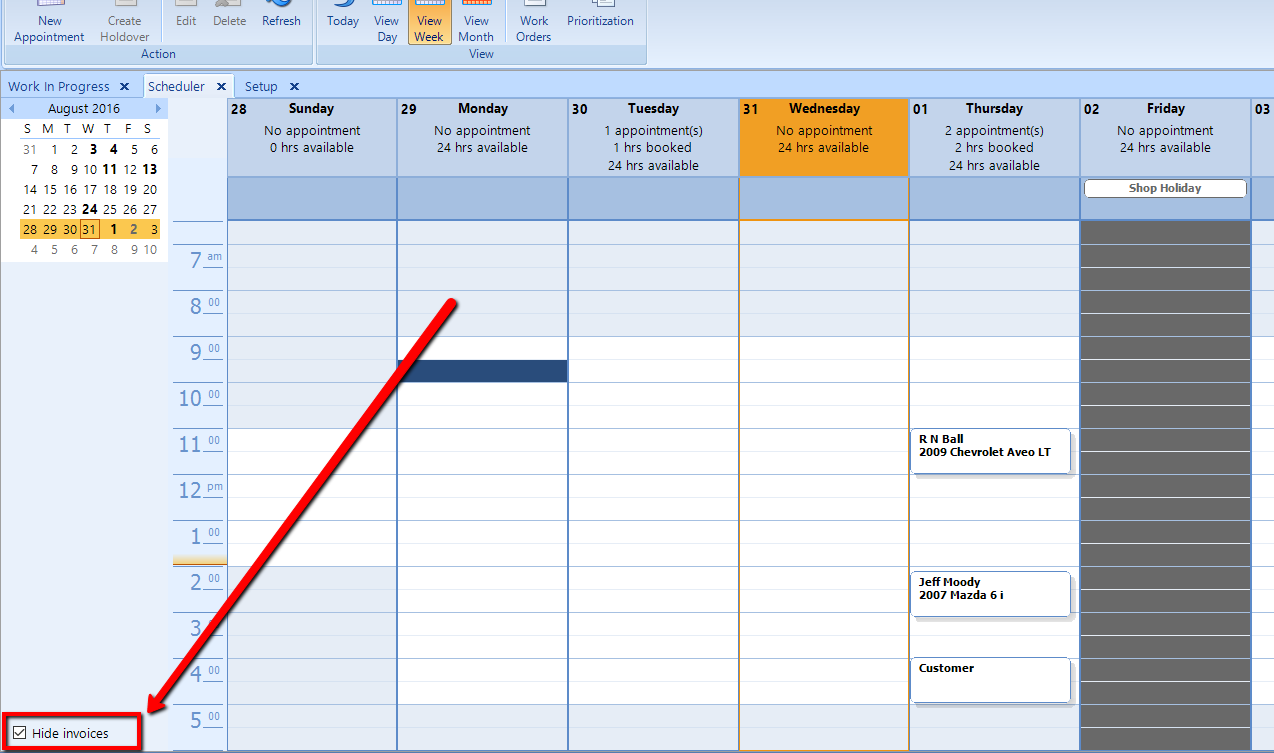
Two types of items can appear on the calendar—each of which denotes an appointment time and duration:
An appointment has not yet become a work order — these appear in yellow.
A work order that on the schedule in the future — these appear in white.
This figure depicts examples of appointments and work orders:
You can create a new appointment from the scheduler view by following these steps:
Click the New Appointment button on the ribbon.
The Appointment pop-up window will appear, as shown in the figure below.
The current date and time will appear in the Scheduled link. To choose another date and time for the appointment, click the link and make your selection.
Enter the information for the appointment, including the Duration of the appointment, Contact name/Service Item, the Odometer reading, and a Note that describes the purpose of the appointment.
Optionally, choose a Technician to assign to this appointment. It will then automatically assign that technician when converted to a work order.
In the section below, we explain each of the given in the instructions above fields in the Appointment pop-up.
After entering the information, click OK and the appointment will be appear as a tile in appointment date and time on the calendar (for the specified duration).
Another easy way to create a new appointment is to navigate in the calendar to period in which you want to place the appointment and then double-click in the time slot. An Appointment pop-up window will appear that already displays that date and time.
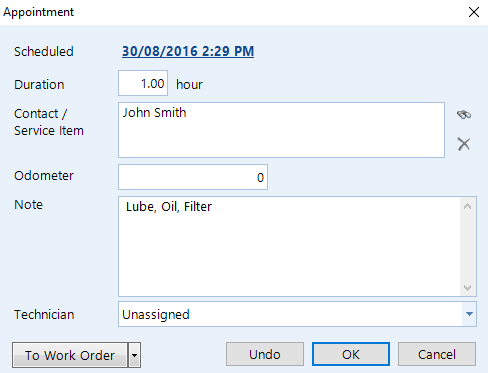
Scheduled — (required) the specific time and date at which the appointment occupies the calendar. Click the link to choose another date/time.
Duration — (required) the appointment duration and will be impact the block of time taken up by the appointment. It is possible to set a default time for appointment during. This is completed in the Location Setup (link to location Setup).
Contact/Service Item — (required field) for identifying the customer and/or their vehicle. Enter a text description, or click the small binoculars icon to link to a new or existing contact (see the figure below). In the pop-up, search for the contact and/or service item or create a new contact by clicking Add Contact, then click Select and to display this contact in the Contact field of the Appointment window.

Odometer — (optional) capture the value of the odometer reading, if the customer provides it. This can be useful in advance planning and review of original equipment manufacturer recommendations for maintenance on the vehicle.
Note — (required field) describe the details for this appointment, including the reason for the visit and any other relevant information.
Technician — choose an available technician from the drop-down.
To edit an existing appointment, click the appointment tile in the calendar and then click the Edit button in the ribbon. Or, simply double-click the appointment tile; or right-click over the tile and click Edit in the pop-up menu.
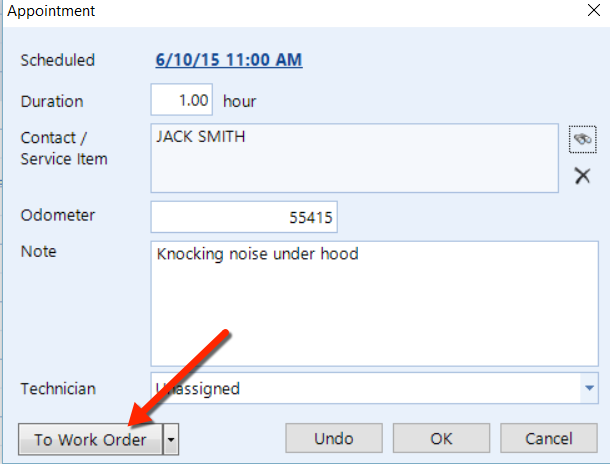
At any time, you can convert an appointment into a work order and begin preparing the work order prior to appointment date and time. This is especially useful for cases in which a customer wants to schedule some work that was previously deferred. Advance work order preparation in this manner gives the shop the flexibility to source and order any supplier parts in advance. After creating the work order, we recommend that you save it as Future Work.
After opening an existing appointment, click the Convert to Work Order button to create a new work order using the appointment details.
It is possible that a work order could be created as the first step through the new work wizard that is not going to be done until a future date. An example of this would be tires that have been quoted and the customer would like to have done sometime in the future or other work that the customer has confirmed they would like performed. In these instances, it may be appropriate to create the work order in advance in order to facilitate the holding of the inventory or advance ordering of supplied parts. Follow the New work process to create the work order. Note that every work order has an appointment time that is adjustable. While the work order is open adjust the appointment time to the future date. Ensure that the work order is saved as future work and close.
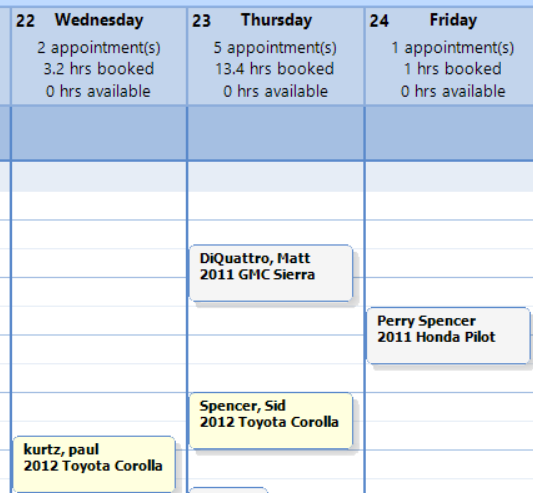
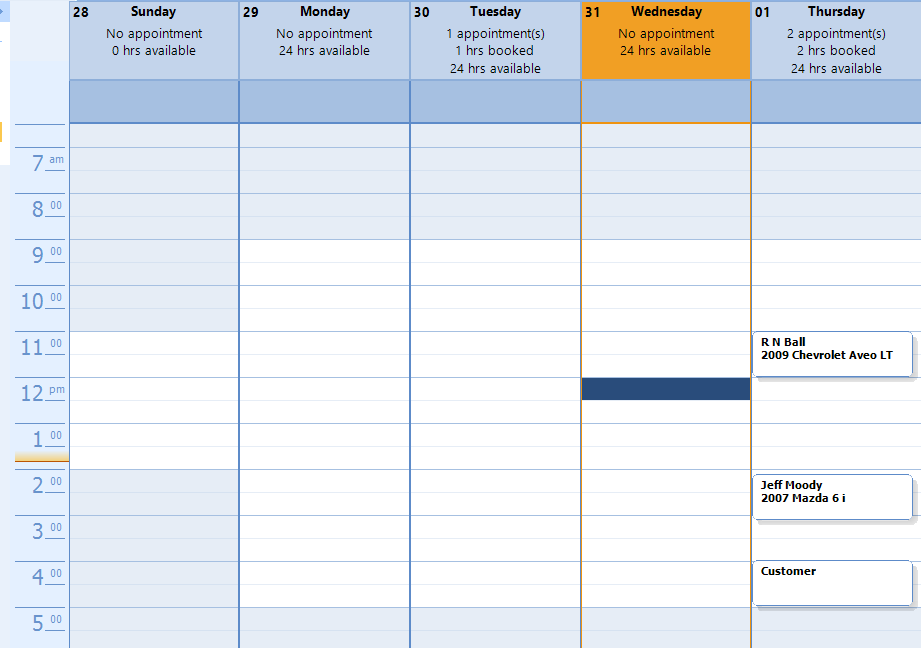
All three calendar views display some basic appointment metrics by day to give a snapshot of the time availability on the day.

The metrics included the number of appointments booked, the number of hours booked and the number of hours available
appointments — a count of the number of appointments bookings for the day.
hrs booked — the sum of the total duration for all appointments and work order booked for the day.
hrs available — the sum of the total technician hours available for the business day, according to the technician schedules found in Setup > Scheduler > Employee Hours.
To configure the Scheduler according to the requirements of your shop, navigate to Setup >…. There, it’s possible to configure holidays, shop hours and employee hours. Each of these settings will impact how the scheduler presents relevant information for booking appointments. We describe each setting below.
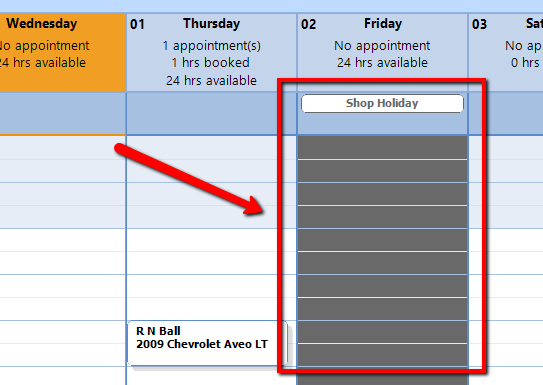
Add your shop holidays to the Scheduler. For example, your shop may be closed on Christmas and New Year’s Day. Or, you may have some holidays on which the shop is open for hours other than standard business hours. These can be set to recur for differing periods, according to various option choices—including, for example, an annual recurring holiday on the same day or a specific day of the month.
As we show in the figure below, any holidays that you configure in setup will appear in the Scheduler as grey boxes to indicate that the shop is not open. If a user attempts to create an appointment on that day, a prompt will appear to confirm that the appointment is to be created on a holiday.
These are the standard business hours that the shop is in operation. The Scheduler displays business hours in white and hours outside of business hours appear in blue—as we show in the figure below. For example, a shop that is open from 9am to 5pm except for Sunday, when it is open from 11am to 2pm, would have a schedule that looks as shown in figure below.
Maintain employee schedules using Employee Hours within Scheduler setup. For the technicians, this will provide the hours available to the scheduler. Employee schedules can be setup according to non-specific dates for a two-week period, or they are editable for each day of the month using the month view.
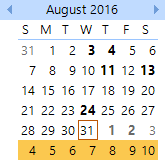
Another method for quickly navigating in the calendar use the month view calendar on the left panel. Select any day in the calendar to toggle the window to that particular day, week, or month according to the current view. Work days are shown in black, while shop holidays are grey.
Check the Hide Invoices box in the lower-left of the Scheduler window to hide invoices the schedule. When unchecked the schedule will display all past appointments within the schedule that have been converted to invoices.