Time clock events track time outside of attendance, work orders, and jobs on work orders. The time clock is also useful for tracking varying types of downtime or how employees spend their time on other activities. Before a user can clock in and out, the time clock must be properly set up.
Time Clock Statistics Extended Report Detailed Breakdown
This article covers each of these tasks:
Login to the time clock
Clocking in to a job
Clocking out
Running time clock reports
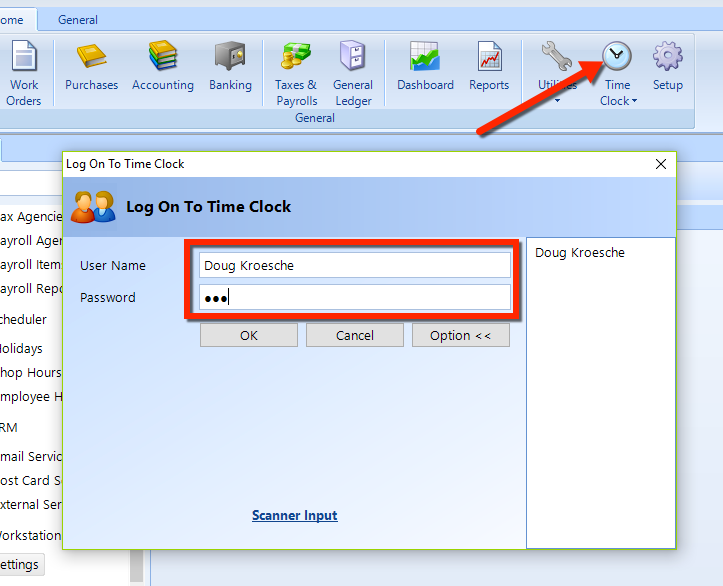
To login to the time clock, click on the top-half of the Time Clock button in the Home ribbon. In popup, choose a user in the right pane, enter the Password of the user that is clocking in, and then click the OK button. At this point the system will automatically clock the user in for attendance.
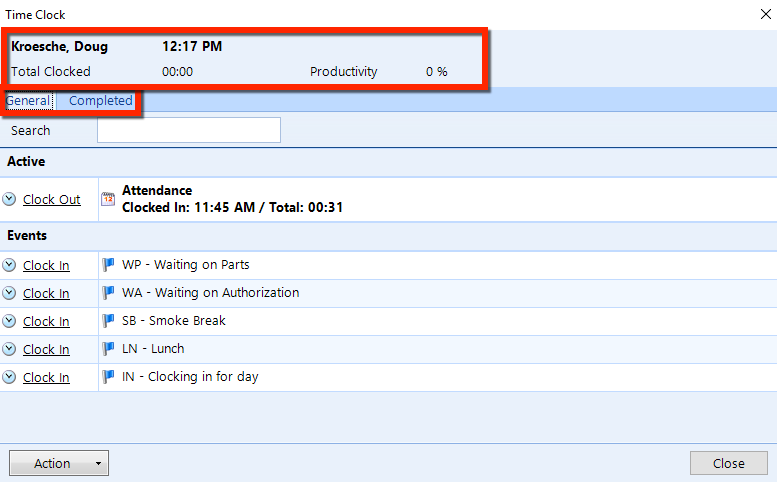
In the Time Clock popup, you'll see the user name and the current time, the Total Clocked time, and Productivity indicator.
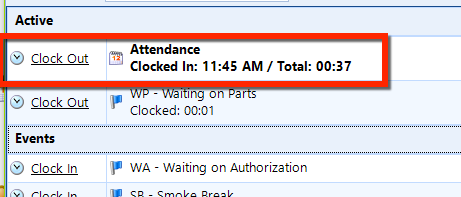
The General tab lists all of the jobs assigned and also all of the events that are available for this user to clock time against. In the General tab, you find a listing that contains three categories:
Active - items to which the user is logged in.
Available - all of the jobs that have been assigned to this user.
Events - all possible time clock events for this user.
The Completed tab lists all jobs that have been completed today for this user.
Click any of the Clock In links to clock the user into job or event, In the popup, confirm that the information is correct, optionally enter a Note, and click the OK button.
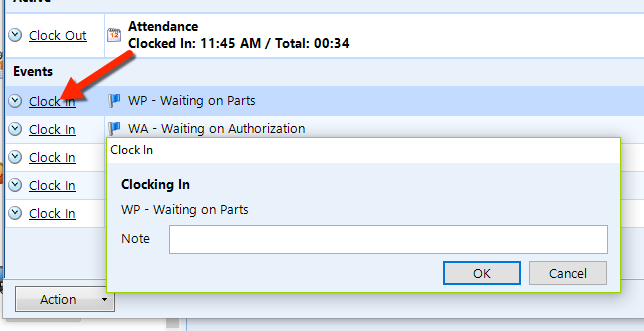
When the popup closes, you'll see a new item the Active section of the listing.
You could click the Clock Out link to clock out of this job or event. Or, you can clock in to the next job or event, as given in the explanation below.
Instead of clicking the Clock Out link, a user can click the Clock In link for the next job that the user is going to perform. In this case, a different popup will appear that prompts the user to enter a note for job on which s/he is clocking out and also for the job to which s/he is clocking in.
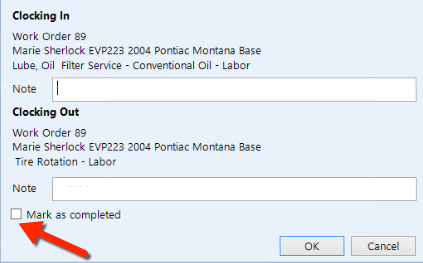
If the previous job or event is complete, the user should check the Mark as Completed box, and then click the OK button. If this box is not checked, the job will still appear in the Time Clock listing after closing the popup window. Any completed job will appear in the Completed tab.
In the Time Clock Setup article, you'll find that some users have the ability to close the shop by clocking out all users. Such a user can click the Time Clock drop-down button in the ribbon, and then click the Close Shop item (see the figure).
This action clocks out all users from every job or event. In the popup, you can optionally enter a Note to explain this action.

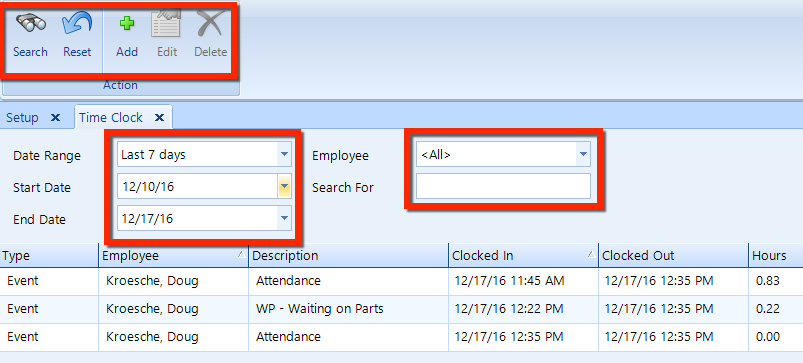
To view time clock records and reports, click the bottom-half of the Time Clock drop-down button in the Home ribbon, and then click the Time Clock Records item (see the figure).
Enter a date range and specify other search criteria. Click the Search button in the ribbon to display matching time clock records.
If a user has suitable security permissions, s/he can use the buttons in the ribbon to Add, Edit, or Delete time clock records.