
The work flow management module includes a variety of features for creating and managing work orders, credits, estimates, and appointments. You can manage and organize all of these from the initial appointment all the way through to the posting of the invoice—while also keeping track of all intermediate stages such as write-up, technician assignment, and job status.
In addition the extensive help found in the Work Order chapter, you can view detail walkthroughs of several work order features in the webinar segments below.
In addition to the help articles, you can view detail walkthroughs of several work order features in these webinar segments:
Part 3 - Inspections and Catalog Lookup
Each of the sections below contains a link to the corresponding webinar segment, along with a short tutorial that contains cross-references to the help articles.
Watch the first segment of the webinar:
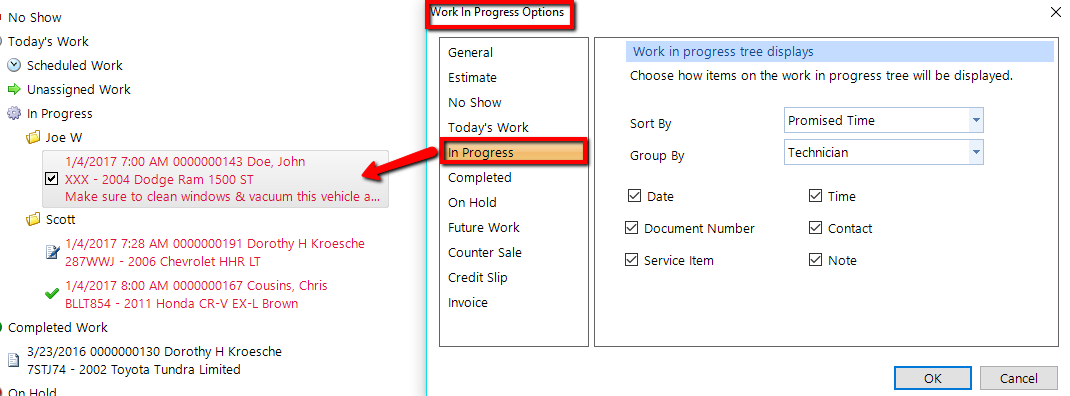
Display Options - You can control the display of the WIP subfolder by changing the work-in-progress options. These options manage the sorting, grouping, the amount of information, and which types of information that appears in each work order at different stages of the workflow. These options are accessible from within the WIP screen.
Click the small pop-out arrow found in the bottom right of the Work Order menu group (see the figure below)
The left pane of the WIP Options window presents a series of folders and subfolders. The software intelligently and contextually configures which options are available. The left window pane of the WIP Options represents each node. Click on each item in the left pane to display the formatting options that correspond to that node in the right window pane.
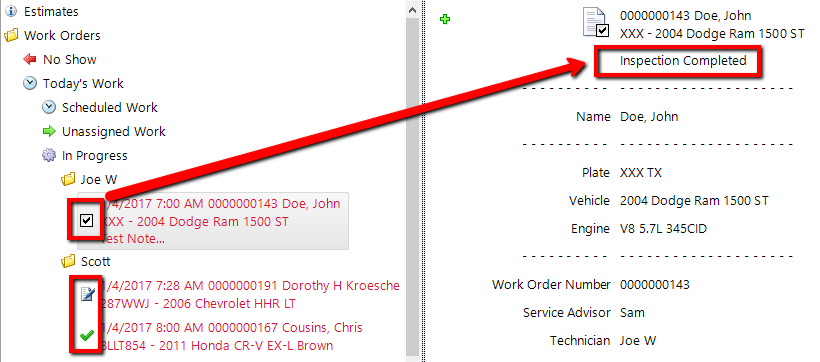
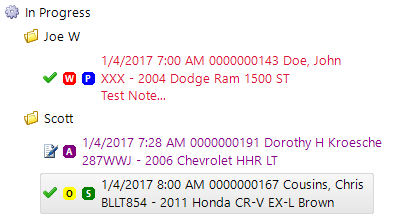
Work order stages in the work-in-progress screen offer different icons to identify the work order stage as it progresses from initial write-up through to completion. Each of the workflow stages is identified with a icon shown on the WIP screen at left of the work order.
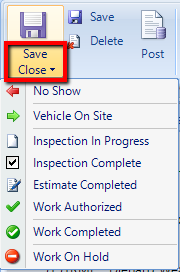
For this feature to function effectively, the workflow stage icon must be actively updated as the job progresses. Edit the workflow stage by opening the work order and adjusting the workflow stage from the Save/Close button at top left. Additionally, the work order stage can be edited from the WIP, the Priorititization feature, or the right panel in the work order.
Workflow Stage icons will appear on the WIP screen beside each work order and the workflow stage description on the right-pane summary–for easy identification of the current workflow stage for all work orders in progress.
Watch this segment of webinar:
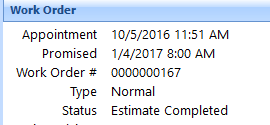
Work order details in the work-in-progress window pane may appear in different color font, including black, magenta, or red. The purpose of the color scheme is to alert the service advisor and technician concerning the time available to finish the work, relative to the time that the vehicle was promised.
Black - Current time is outside of 1 hour from the stated promised time
Magenta - Current time is within 1 hour of the stated promised time
Red - Current time is after the stated promised time
For this feature to function effectively, an advisor should discuss promised times with each customer. This promised time should be precisely set on each work order to ensure that the font color accurately reflects the actual situation.
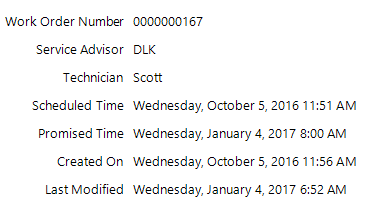
As a vehicle flows through the work-in-progress sequence, it will likely be necessary to actively adjust the promised time to reflect any changes in circumstance. This includes the sale of additional mechanical work which may require a delay adjustment to the promised time. Edit the promised time by opening the work order and adjusting the promised timed in the right panel.
Work Order Flags - Work order flags appear in the WIP screen and can identify "special conditions" for the work order. The name, description and colour of the flags are customizable and may have a wide array of uses depending on the shop. Some examples are waiting customer, overnight, shuttle ride, waiting for parts. Setup for the work order flags is accessed from Setup | Work Order Setup | Work Order Flags. Work order flags utilize a code (alpha or numeric), foreground and background color, name and description.

Apply and view work order flags in both the WIP & Prioritization windows:
The flags are also viewable and configurable in the work order editor, the appointments feature, and the scheduler.
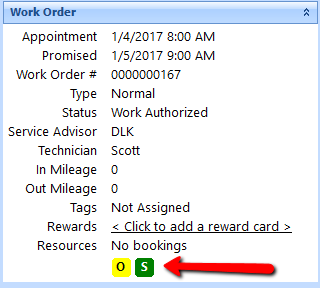
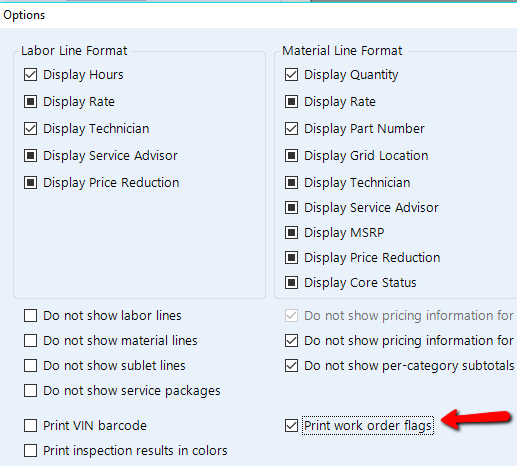
Work order flags can also be set to print on work order and invoice documents.
Watch this segment of webinar:
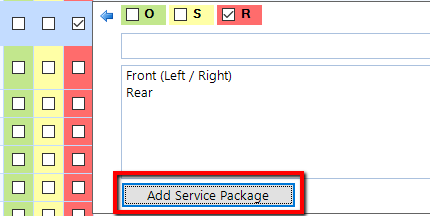
Inspections, Completing the Inspection Results easily (check all box) - The O, S, and R headings can be found at the top of the inspection item listing, as shown in the figure.

These designations are Motorist Assurance Program conventional headings to classify each inspection item:
O – OK. The inspection item has no issues on this vehicle.
S – Suggested. The technician suggests that the inspection item should get repair or service.
R – Required. The inspection item must get repair or service for the vehicle to continue safe operation
It's best to enter individual items that are coded S or R, and then choose Tasks > Set Inspection Results To OK. This will set all remaining items to OK and complete the inspection results.
Adding Service Packages from the Inspection - To add a service package that corresponds to the inspection item, click the Add Service Package button.
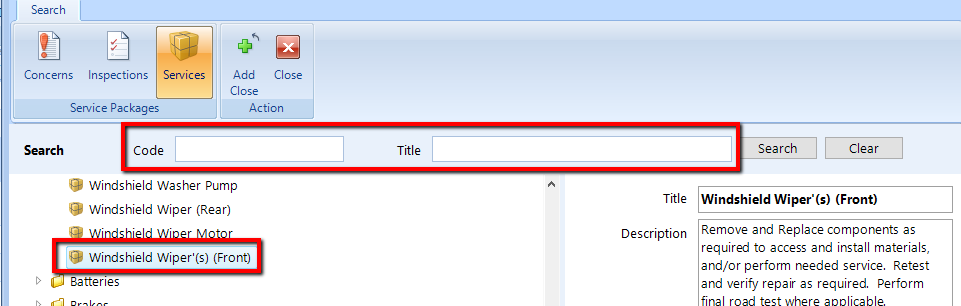
In the Service Package Search popup, enter a Code and/or a Title and click the Search button. From the tree in the left panel, double-click on an item to choose it as the service that will serve as the repair for the inspection item at fault.
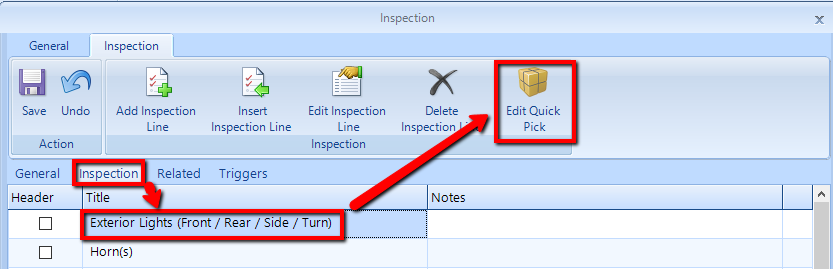
Quick Picks setup - Inspection quick picks provide a list of selected services that will best repair or service the inspected item at fault. Quick picks eliminate the need for a search when adding a service from the inspection. Quick picks are setup from the main ribbon: Setup > Work Order Setup > Inspections. Highlight the inspection, select Edit. Select the Inspection tab from the menu. Highlight the line item, select Edit Quick Picks. Locate and select the desired quick pick service(s). Note that you are able to select multiple items at a time to facilitate a faster setup by holding down the SHIFT or CTRL buttons.
Using Quick Picks - From the Inspection tab (in the work order), follow the instructions in the Add a Service Package for an Inspection Item section of the Concerns and Inspections article. When prompted with the list of services, you will now see Quick Picks at the top of the tree. These will be the selected service that will best repair/service the inspected item at fault.
Work Order Catalog Lookup - the Catalog lookup wizard eliminates the need to select individual line items where a catalog search is required or desired. This feature works best when all services have been added to the work order. Click the Catalog Lookup button in the ribbon.

The Catalog lookup wizard will identify all lines that are setup to Lookup Required, including part and labor lines and provide the catalog lookup for each line. After a catalog lookup of one line item is done, the wizard will proceed to do a catalog lookup of the next line item. This will continue until all lines have been sourced or skipped. Once complete the catalog lookup wizard will close and all pricing is applied to each line item.
Watch this last segment of webinar: