Reminder items are services packages and/or inspections that are applicable to a vehicle and/or service item. A reminder is set to occur at specific time and/or mileage intervals. Reminder items are customizable and yet not necessarily reflective of the OEM service intervals. Reminder items appear in listings with the item name, the last service date, and the date and/or mileage they are due.
Watch the video segments below to see in-depth walkthroughs on Reminders functionality.
Below is a summary of each of the subtopics that we cover in this webinar. You can find more help in the Reminder Items, Reminder Groups, and Estimates topics.
Reminder items are services packages and/or inspections that are applicable to a vehicle and/or service item. A reminder is set to occur at specific time and/or mileage intervals. Reminder items are customizable and yet not necessarily reflective of the OEM service intervals. Reminder items appear in listings with the item name, the last service date, and the date and/or mileage they are due. As a customer builds history with the shop, successive reminder items will appear and will be relieved/reset after any service packages and/or inspections that correspond to the reminder item are complete. Red flags indicate the item is past due, yellow flags indicate the item is coming due soon, and green flags indicate the item is not due.
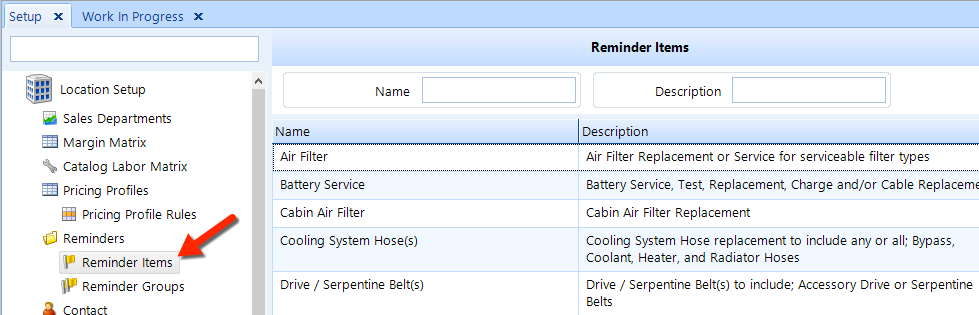
To access the Reminder Items setup feature, click on the Setup button in the ribbon, then locate and click on Reminders beneath the Location Setup node in the left window pane. Then click Reminder Items. See the figure below.
Follow these steps to search for a reminder item:
Access Reminder Items setup as given in the instructions above.
In the right window pane, optionally enter search criteria in the Name and Description fields.
Click on the Search button in the ribbon to display a listing of matching results.
Follow these steps to add or edit a reminder item:
Access Reminder Items using the instructions above.
To add a reminder item, click the Add button in the ribbon.
To edit an existing item, search the existing reminder items as instructed above and then click on the Reminder Item you need to edit.
Click the Edit button in the ribbon, and a popup window will appear that contains three tabs: General, Intervals, and Triggers.
In the General tab, enter a name and description. In the Intervals tab, you can add one or more interval types. On the Triggers tab, add inspections and service packages that will trigger the resetting of the reminder interval to indicate that the service has been performed.
Enter or edit the Name of the Reminder Item, and add a Description.
Click on the Intervals tab.
To add a new interval, click the Action drop-down button, then click Add Reminder Interval.
From the drop down list, choose a Type for the reminder item.
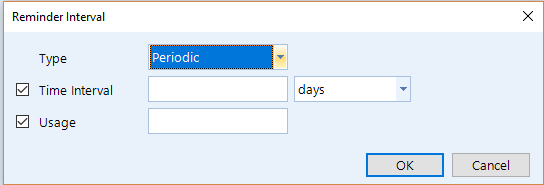
For a Periodic type, check the Time Interval box, then enter a value and choose either days or months from the drop down list. Then check the Usage box and enter a number that represents the usage interval (such as miles, kilometers, or hours). See the figure below. Click the OK button to commit your changes.
A periodic interval does not require both Time and Usage. Periodic intervals can be set with either the Time or Usage according to what the reminder item is measuring.
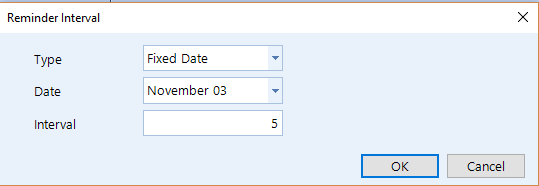
For a Fixed Date type, you set an interval to a specific date each year. From the Type drop-down choose Fixed Date, then choose a particular Date in the next drop-down, and then enter a value for the Interval. Enter value of 1 for an annual interval. See the figure below. Click the OK button to commit your changes.
To delete an interval, click on the interval you need to delete, click the Action drop-down button, and then click the Remove button.
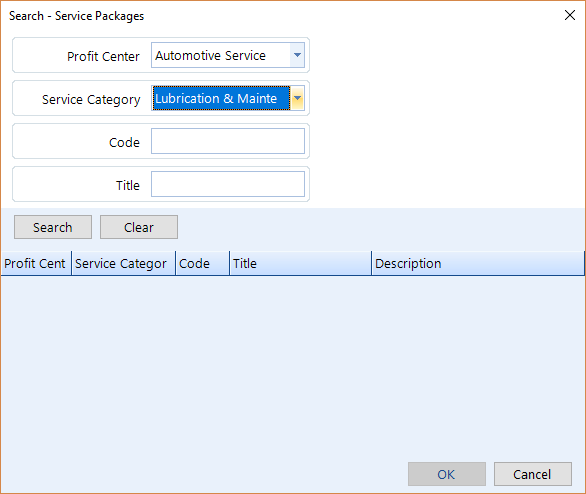
To add a trigger, click on the Triggers tab, then click on the Action drop-down button, then click on Add Service Package or Add Inspection menu item. Select a Profit Center from the drop-down list, select a Service Category from the drop-down list, enter a Code (Optional), enter a Title (Optional), click on the Search button. Select the item from the list and then click the OK button.
To add multiple trigger items simultaneously, hold down the Ctrl or Shift button on the keyboard and click with the mouse to make additional selections.
Repeat the process as necessary to include multiple service packages and/or inspections. Click the OK button.
To delete a trigger, click on the trigger you need to delete, then click the Action drop-down button, and then click the Remove button.
Follow these steps to delete a reminder item:
Access Reminder Items using the instructions at the top of this article, then search for reminder items as given in the instructions above.
Click on the reminder item you need to delete.
Click the Delete button in the ribbon.
Click Yes to confirm you want to delete the reminder item.
A reminder group is a collection of reminder items that can be assigned to a vehicle simultaneously as one item. Users can easily set and apply different groups that correspond to customer driving habits. One example of a reminder group is a basic maintenance group; another example is a preventative maintenance group. A basic maintenance group might include reminder items for the minimum scheduled work that is necessary for a particular vehicle, such as tire rotations and a lube/oil/filter service. A preventative maintenance group would contain the reminder items in the basic maintenance group, along with various inspections and flushes that are relevant for a maintenance-minded customer. When a customer is profiled at the check-in stage, the user can easily apply a reminder group to the vehicle so that appropriate service intervals will be managed, tracked, and communicated going forward.
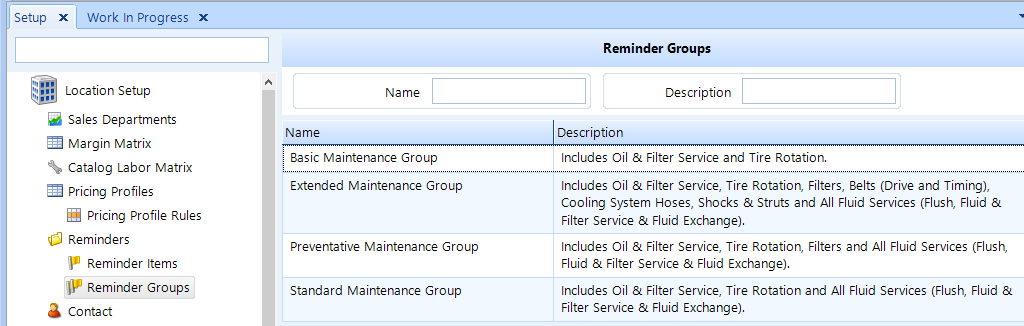
To access the Reminder Groups setup feature, click on the Setup button in the ribbon, then locate and click on Reminder Groups beneath the Location Setup node in the left window pane. Then click Reminder Groups. See the figure below.
Follow these steps to search for a reminder group:
Access Reminder Groups setup as given in the instructions above.
In the right window pane, optionally enter search criteria in the Name and Description fields.
Click on the Search button in the ribbon to display a listing of matching results.
Follow these steps to add or edit a reminder group:
Access Reminder Groups using the instructions above.
To add a reminder group, click the Add button in the ribbon.
To edit an existing reminder group, search the for a reminder groups as given in the instructions above, and then click on the reminder group you need to edit.
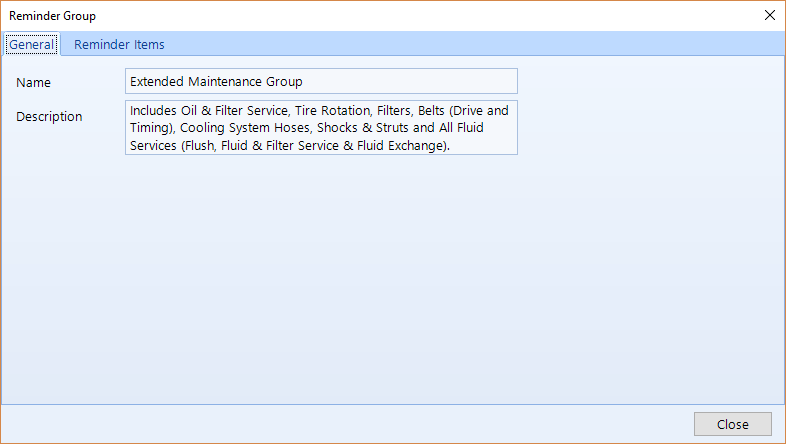
Click the Edit button in the ribbon, enter the Name of the reminder group, and enter a Description describing the purpose of the reminder group.
Click on the Reminder Items tab, then follow the instructions below.
To add a reminder item:
Click on the Action drop-down button.
Click on Add Reminder Item menu item.
Optionally, enter the Name of a reminder Item, and optionally enter a Description.
Click on the Search button, choose an item from the list, and then click the OK button.
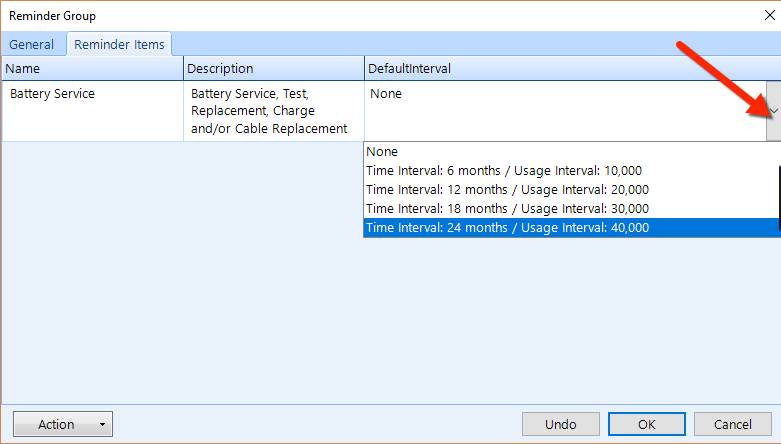
Hover your mouse over the Default Interval field and a drop down list will reveal itself. Click the drop down arrow and choose the default interval for item if you prefer. Or, you can leave it as None and set the Interval if you're applying it to a vehicle or service item. You can establish multiple intervals when configuring reminder items.
Repeat the process for each reminder item that you need to add to the group, then click the OK button to commit your changes.
To delete a reminder item from a group:
In this listing, click on the reminder item that you need to delete.
Click on the Action drop-down button, and choose Remove.
Click the OK button.
Follow these steps to delete a reminder group:
Access Reminder Groups using the instructions at the top of this article, then search for a reminder group using the instructions above.
Click on the Reminder group you need to delete.
Click the Delete button in the ribbon.
Click Yes to confirm that you want to delete the reminder group.
Follow these steps to include a reminder item in work order:
Double click on the item you wish to add to the work order, and review the list of services packages and/or inspections that will satisfy the reminder item.
Double-click on the item you want to add to the work order. If this item has any relationships, you'll see a popup window asking you to choose and confirm the related items.
Choose the items you want to add to the work order by checking the box to the left of each item. Some items may not be optional and the check box for these will be uncheckable.
Click the OK button.
Repeat the process above for each item you wish to add to the work order.
If the customer had the service performed somewhere else, you can remedy it so your service records are updated even though you didn't sell it.
Follow these steps to apply a remedy:
Select the reminder item you wish to remedy by single clicking on it.
Click the Action drop-down button and choose Remedy.
Select or enter the Date the service was performed using the calendar combo box.
Enter the Usage (typically mileage) value.
Optionally, enter a Note about the item and then click the OK button. The notes entered do not appear on any customer documentation but it does appear on the service items history when you hover the mouse over it.
Select the appropriate service from the list by clicking on it.
Click the OK button.