Prioritization
Overview
Prioritization
OverviewThe prioritization feature is a supplemental workflow organizer that can be used to obtain a snapshot status of all the vehicles that are currently in the shop. Click the Prioritization button in the ribbon to access this feature.
Watch the following videos as a supplement to reading this article:
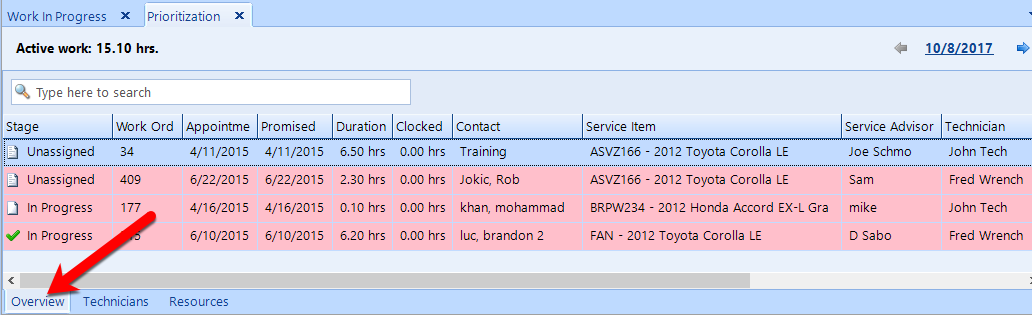
There are three different views for prioritization. In the Overview tab (shown immediately below), you can view a single-column listing of a all vehicles in the shop. The Overview tab contains a detail listing of all appointments, unassigned work, and assigned work. Each work order listing includes the appointment time, promised time, duration, details, and–if applicable–the service advisor and/or technician. Using the buttons in the ribbon, you can print, email, or export this view.
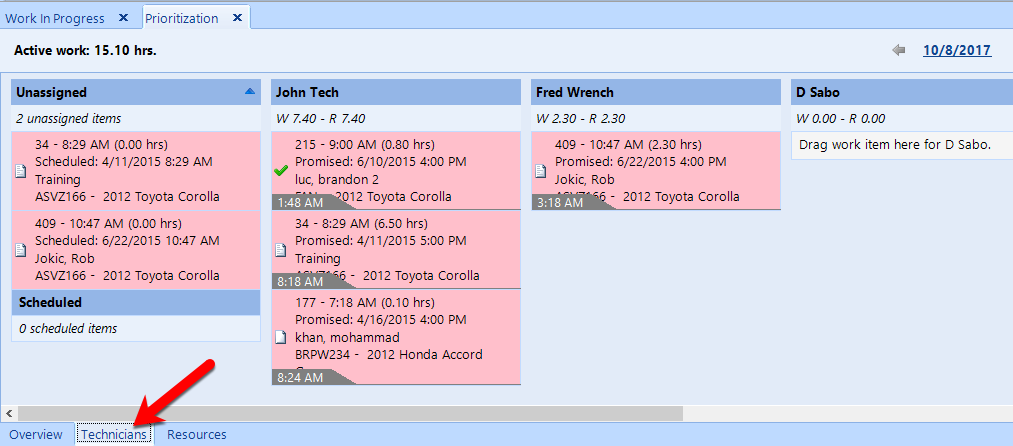
The Technician tab displays one or more groupings of vehicles for each technician, as shown in the figure.
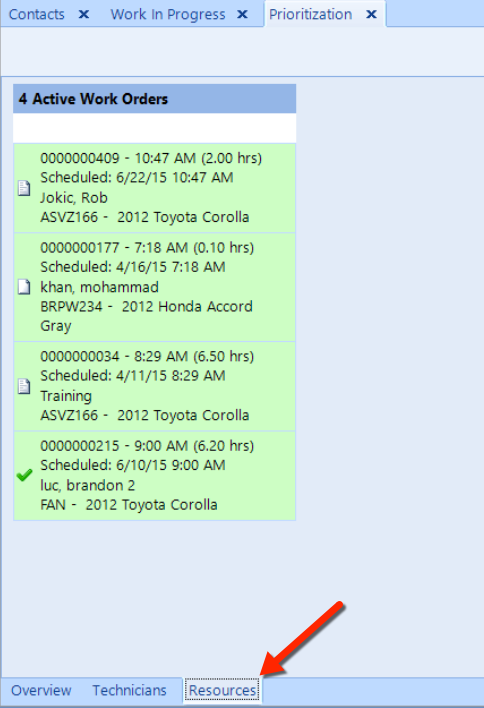
In the Resources tab, you can schedule work orders for blocks of time to resources. A resource may be an (alignment) bay or a piece of equipment such as tire balancing machine. Resources are setup in Setup > Resources. The time available for a particular resource is aligned with the shop hours for a specific day.
Below, we explain each of the major options available to you in the Prioritization window.
In either the Overview tab or Technician tab, you can change the priority of the work orders–simply by clicking a work order tile and then dragging the tile up or down to the new position. This feature is useful for notifying technicians which work order(s) require attention first and will be reflected in the technician login view.
To manually adjust the order of the technicians in the Technician tab, click on a technician name until it is highlighted in a blue box, then click-and-drag to the new location that you have in mind. To reset the layout, click the Reset Layout button in the ribbon to return the technician ordering found in Employee Setup.
From either tab, open a work order directly by double-clicking a work order tile.
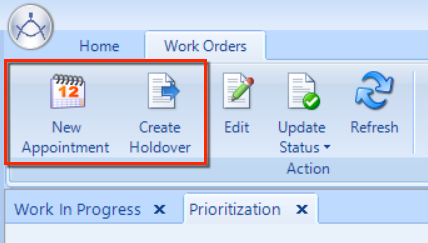
Click the New Appointment button in the ribbon to schedule a new appointment from the prioritization screen. Any appointments made from within the Prioritization window will also in the Scheduler.
Appointments with a future date may be allocated to technicians in order to build out a by-resource workflow for a particular day–which may allow for more accurate scheduling. We recommend that appointments be set with a reasonable Duration, since scheduling periods will be based on this estimated time.
A holdover is a function for allocating a portion of an invoice to a future date. A holdover will appear in the Prioritization window–and also in the Scheduler as a future appointment on the given holdover date.
Follow these steps to create a holdover:
Select a work order on which work will not be completed on the given day.
Click the Create Holdover button in the ribbon to open a popup window.
Click the Scheduled link to open a window in which you can choose a future date when the work is to be done.
Enter a Duration (in hours) for the amount of holdover effort that is being deferred to a future day.
Enter a Note, choose a Technician, and click OK to close the popup.
After completing the steps above, you can click the date link in the upper right corner of the window to choose the date of the holdover. There, you'll find a work order tile denoting the holdover for the duration specified. Double-click to open the work order, or go directly to the holdover event to review or edit (as necessary).
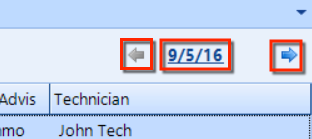
Use the date link and arrows to navigate to a particular date on the calendar.
Click on a tile for a work order on which you need to make changes, then click the Edit button in the ribbon to open the work order. You can also edit a work order by double-clicking a tile or, right-click on tile and choosing Edit from the pop-up menu.
The applicable work order status is shown for each work order–either in the Stage column of the Overview tab or by hovering over a work order tile in the Technician tab.

Click the Refresh button in the ribbon to ensure that the most current information is shown on the Prioritization window–including the most recent adjustments.
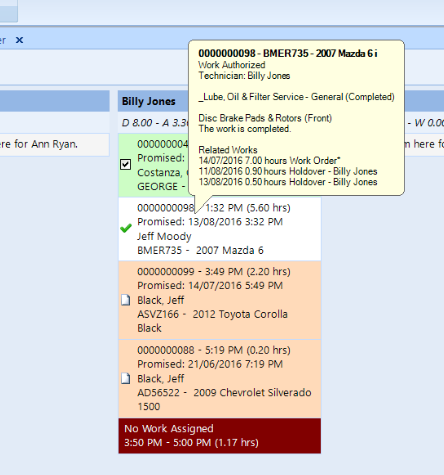
After choosing a particular work order tile, use either the Service Advisor button or the Technician button in the ribbon to assign the work. You can also right-click over a work order tile, as shown in this figure:

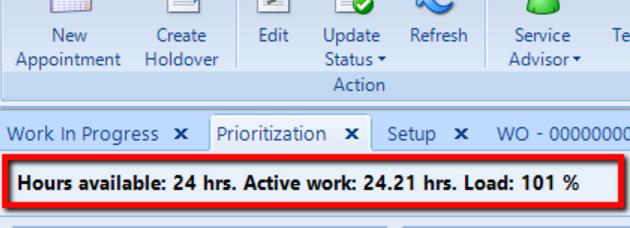
At the top of the Prioritization listing, you'll find an effort summary for this day's schedule:
Hours available – a total of all available technician hours remaining for the particular day on the schedule. This is a total of all of the work hours remaining. If a technician schedule has not been configured in setup, then they will not be included in this total. This setting is found at Setup > Scheduler > Employee Hours.
Active Work – this is the total invoice labor hours remaining that are assigned to technicians, plus any appointment and unassigned work durations. The labor hours remaining is a total of the “R- Assigned Work Remaining” for each technician.
Load – this is the ratio of sold work to the hours available (Active work ÷ Hours available)
In the Technician tab, a small clock icon may be visible on some of the work order tiles (shown in the figure below). This is an indication that a technician is clocked in for that job. This can be helpful for quickly identifying what each technician is working on at any given time.
Hover the mouse over a work order tile to view a pop-out that contains an extended summary of the work order, including job details and an indication of whether a job is complete. The work order is completed means that the technician or service advisor has marked the job complete using the time clock.
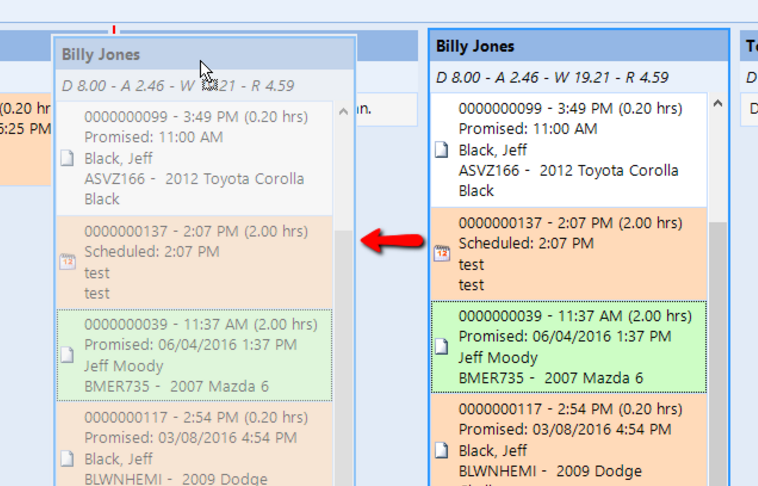
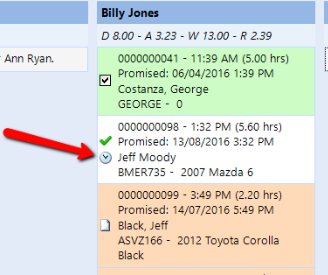
A work order tile may display one of four colors, as shown in the figure below:
Green – the work order is complete.
White – the work is not yet complete, but will be complete by the promised time and by the end of day.
Orange – work order won't be complete by the promised time.
Red – work order won't be complete by the end of the day, and may not be complete by the promised time.
Grey – shows estimated completion time.
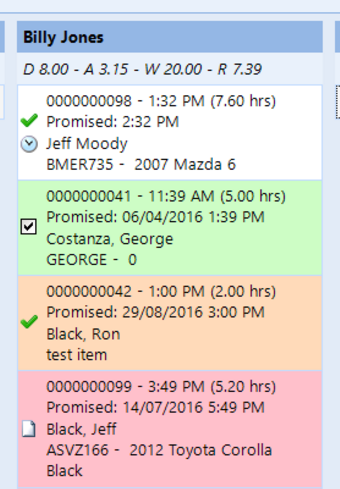
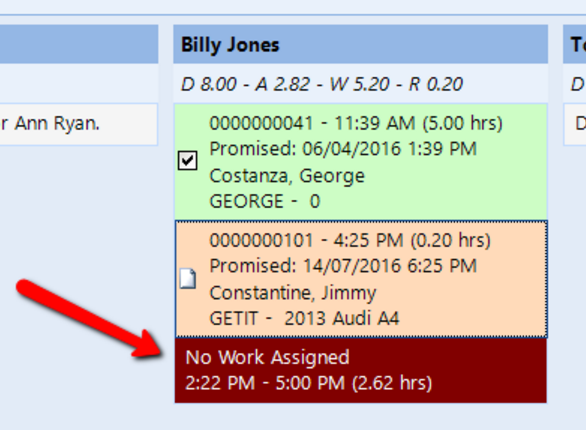
Directly below the technician name, you'll find some letter codes (such W ## - R ## or D ## - A## - W ## - R ##). Carefully hover the mouse over these codes to see values for each of the following:
D – Total work hours for the day for this technician, according to the schedule time within setup.
A – Work Hours Remaining in the day (according to the schedule time within setup), less the hours that have already gone past for the day.
W – Total assigned work, according to invoice labour hours that have been assigned to the technician.
R – Assigned Work Remaining, which is the total assigned work (W), less work completed based on the timeclock and current time calculation. If a time clock is not in use, then the calculation is done with the assumption that the technician is working at a rate of the charged hours.
In order to set up a given technician schedule so that D and R appear, go to Setup > Scheduler > Employee Hours.
As shown in the figure below, a tile having the label No Work Assigned will appear to indicate a period of time in which the technician has an expected gap in assigned work. For scheduling purposes, this is useful to quickly determine a period of downtime for a given technician. For a designation of no work assigned to take effect, it's necessary that an applicable work schedule has already been specified for the technician. In order to set up a given technician schedule so that D and R appear, go to Setup > Scheduler > Employee Hours. If a technician schedule is in place, then the No Work Assigned duration will be the difference between assigned work remaining (R) and Work Hours Remaining (A).